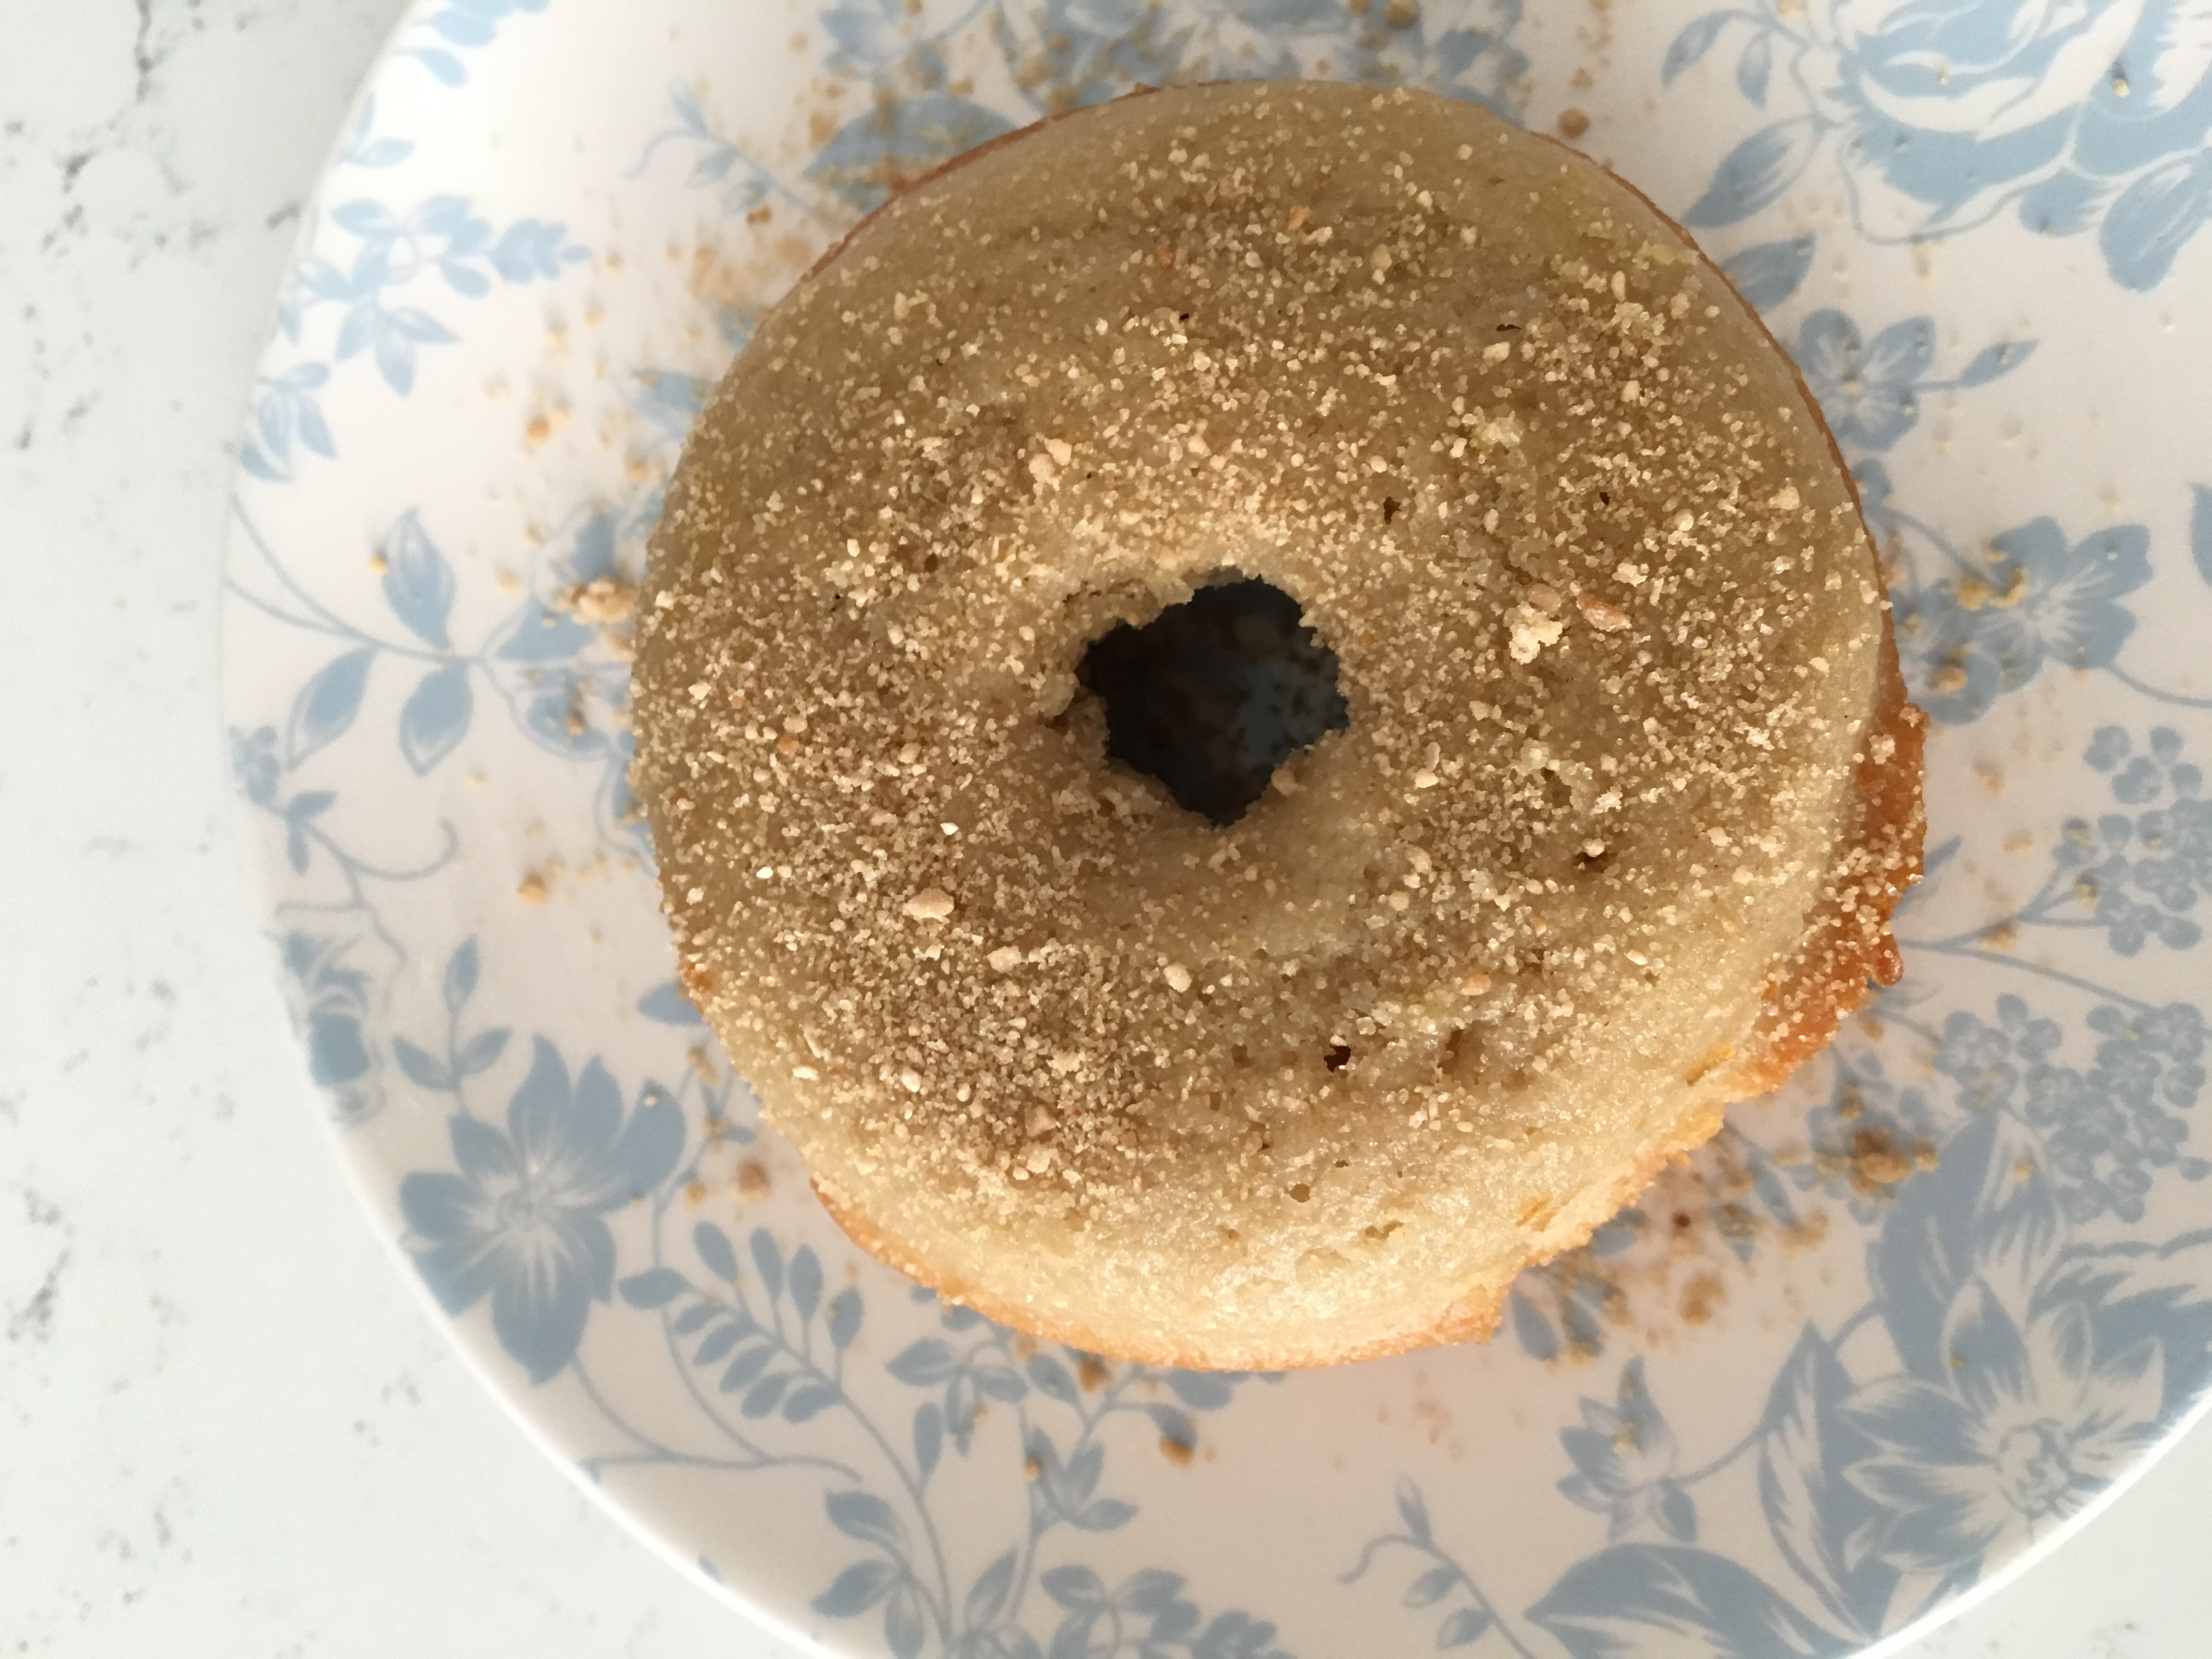
Maple-Apple Cake Donuts

Sure, pumpkin anything is bringing sexy back this fall (and all the falls) but apples have been an autumnal all-star far longer. We could do a comparison table here showcasing everything you can do with apples versus pumpkin and I bet these two tasty ingredients would be neck-and-neck, but that is too much formatting and work for me to handle before my next yoga class (truth be told). So instead, I’m going to tell you about how I turned this delicious Pumpkin Cake Donut recipe from King Arthur Flour into a Maple-Apple Cake Donut using apples I picked from my local Waters Orchard.

Growing up in Massachusetts, my favorite donuts were those powdered cake donuts from Dunkin’ Donuts which inevitably left more sugary dust on your chin and clothes than made it into your mouth. I loved the fluffy texture and sweet remnants you got to lick off your lips after the treat was done. As a nutrition coach, I tend not to eat or recommend too many donuts these days but if you’re going to do it, do it good.

The following Maple-Apple Cake Donut recipe was inspired by sweet apples and a small jar of granulated maple sugar from my parents up in New England. The ingredients did the talking, King Arthur helped me with the baseline, and my creative mind made swaps to cut back on added sugar and fuse these fluffy Os with fall flavor.

Maple-Apple Cake Donuts

MAPLE-APPLE CAKE DONUTS

Makes 12 donuts

Ingredients:

  • 1/4 cup coconut oil, melted
  • 1/2 stick of butter (or 1/4 cup), melted
  • 3 large eggs
  • 1/2 cup cane sugar
  • 1/4 cup light brown sugar
  • 2 Tbs maple syrup
  • 1 1/2 cups 15-minutes homemade apple sauce (recipe follows)
  • 1 tsp ground cinnamon
  • 1/4 ts ground nutmeg
  • 1/8 tsp ground cloves
  • 1 1/2 tsp fine sea salt
  • 1 1/2 tsp baking powder
  • 2 cups all-purpose flour, level
  • Granulated maple sugar for dusting


Directions:

  1. Preheat the oven to 350°F. Lightly grease two donut pans
  2. In a large mixer, use the flat beater attachment to combine the oil, butter, eggs, sugars, maple syrup, apple sauce, spices, salt, and baking powder until smooth. (You can also do this by hand with a little elbow grease and a whisk). 
  3. Add the flour, stirring just until smooth.
  4. Fill the wells of the donut pans about  to the top but be careful they don’t overflow.
  5. Bake for ~18 minutes, or until a toothpick inserted into the center of one comes out clean. 
  6. Remove from the oven, let cool a few minutes, loosen the edges (if need be) with a butter knife, and gently flip onto a rack to cool. 
  7. While the doughnuts are still warm generously dust them with granulated maple sugar (or cinnamon sugar).
  8. Let cool completely and store at room temperature for several days. I like to place them on a plate, stick them with toothpicks, and tent them with plastic wrap so they have room to breath.


HOMEMADE APPLE SAUCE

Ingredients:

  • 2 extra large or 3 large apples – peeled, cored and chopped
  • 1 tsp brown sugar
  • 1/2 tsp ground cinnamon


Directions:

  1. In a medium microwavable mixing bowl, combine prepped apples with sugar and cinnamon.
  2. Microwave for 3 minutes, stir, and microwave again another 3-4 minutes until apples are soft (not mushy) when pricked with a fork.
  3. Transfer to a blender or food processor and blender until mostly smooth (any little chunks will taste delicious when you bite into them).


Chilled Spinach Detox Soup for your Meatless Monday

Whether you’re a vegetarian, vegan, conflicted omnivore or ardent carnivore, it doesn’t hurt to give yourself at least one day each week where you focus on a plant-based diet. I love the Meatless Monday movement for this very reason. It’s approachable, non-preachy and good common sense. I’m completely inconsistent with my posts to this end and am way overdue in offering a new recipe for you all.

As some of you know, I am a big believer in whole foods, home cooking-focused detoxes. I’ve guided over 100 different folks from all over the country through my seasonal detoxes over the course of the last two years and really enjoy coming up with meals that are simple, tasty and clean. My latest 4-day detox includes the following recipe. If you want to buy the self-guided version it’s now available through my online store.

IMG_1373

I love picking up ingredients for this and all detox recipes from my local farmers market. Food is always better – both in taste and nutrient density – when locally grown with less transport and shelf time.

IMG_1432

Chilled Spinach Detox Soup

{makes 4 side portions or 2 mains}

Ingredients:

  • 1 Tbs olive oil
  • 1 Tbs organic unsalted butter
  • 2 small sweet onions (the size of baseballs)
  • 2 cloves of garlic
  • 1/2 tsp sea salt
  • 1/2 tsp muchi curry powder
  • 4 cups chicken or vegetable stock
  • Juice of 1/2 lemon
  • 5 oz baby spinach
  • 2 sprigs fresh thyme leaves
  • Freshly ground pepper to taste
  • Top with a couple tablespoons of low-fat, plain Greek yogurt

Directions:

  1. Sauté onions in butter and oil over medium heat until soft, adding a generous pinch of salt as you stir.
  2. Add curry powder and garlic. Sauté another minute until fragrant.
  3. Add stock and simmer for 10 minutes.
  4. Add spinach and thyme and simmer another 5 minutes. Remove from heat and let cool.
  5. Blend until smooth.
  6. Served hot or chilled and garnish with yogurt and ground black pepper. Stir well and enjoy!

Black Rice and Lentil Veggie Burgers

After a weekend of eating way more meat than usual (ballpark franks – go Nationals! – and barbecue), I decided it was high time for a Meatless Monday recipe. I love making homemade veggie burgers because you’re in charge of what goes in, and what stays out. My Black Rice and Lentil Veggie Burgers are loaded with plant-based protein (1 cup of lentils has 20 grams), iron, zinc and antioxidant-rich veggies like asparagus and carrots. I used rolled oats in place of bread crumbs and gelled chia seeds instead of eggs to bind these beauties together, keeping the end result gluten-free and vegan.

Serve them over a bed of fresh mixed greens, some sliced fresh avocado and tomato, and kick it up with your favorite hot sauce for a simple, healthy supper or easy-to-pack lunch for those of you on the go. These would also be awesome for any vegetarians in need a Fourth of July BBQ alternative to burgers and hot dogs.

Black Rice and Lentil Veggie Burgers

Black Rice and Lentil Burgers

{makes 6 patties}

What You’ll Need:

  • 1 cup black rice
  • 1/2 cup lentils
  • 1/2 cup carrots, coarsely grated
  • 1/2 cup asparagus, coarsely grated
  • 1/2 red onion, diced
  • 2 cloves garlic, minced
  • 1/2 cup gluten-free rolled oats
  • 1/4 cup chopped mint
  • 2 Tbs chia seeds (soaked in 4 Tbs of water)
  • 1 Tbs cumin
  • Salt and pepper to taste
  • 1/4 cup olive oil

How to Make It:

  1. Preheat oven to 350 degrees F
  2. Bring the rice to a boil with two cups of water. Reduce to a simmer and let cook, covered, for 35-40 minutes or until all water is absorbed. Remove from heat and fluff with a fork. (Tip: Do this ahead and save time.)
  3. Cook the lentils in 1 1/2 cups of water. Cover, bring to a boil, lower heat, and cook for about 20 minutes or until the lentils are tender and the water is mostly absorbed.
  4. Add chia seeds to water and let stand for 15 minutes until they gel and thicken.
  5. Combine rice, lentils, chia seeds and add all the remaining ingredients (except the oil) in a large mixing bowl. Mix thoroughly.
  6. Take half the mixture and place it in a food processor, pulsing until it forms a thick paste. Add it back to the unprocessed mixture and kneed by hand until combined.
  7. Use a 1/2 cup dry measuring cup to scoop some of the mixture into your hands. Form patties with your hands, flattening on the top and bottom. Refrigerate for 30 min (or up to 24 hours).
  8. Place a heavy skillet over medium/high heat, add the oil and heat until hot but not smoking. Add the patties and cook for 1-2 min on each side or until each side is firm and golden.
  9. Place in a baking dish in the oven for about 15-20 min.
  10. Serve immediately or let cool and store in refrigerator for up to 10 days or freezer for up to 3 months.

Gluten Free Strawberry Balsamic Tart with Mint

Two weeks ago, I shared a recipe for Gluten Free Pie Crust. On this Meatless Monday, it’s time to fill it!

With all the yummy fresh strawberries I’ve been receiving in my weekly From the Farmer basket, I couldn’t resist making a Strawberry Balsamic Tart. This sweet and savory treat is perfect for a summer night and easy to transport to a friend’s BBQ as long as you leave it in the pan. It’s on the healthier side of dessert so feel free to indulge guilt-free or perhaps break the rules and have it for breakfast!

Gluten Free Strawberry Balsamic Tart


What You’ll Need:

  • 1 recipe of Gluten Free Pie Crust
  • 1/2 cup + 2 Tbs balsamic vinegar
  • 2 tsp raw (or lavender-infused…) honey
  • 1 pint fresh strawberries (washed, hulled and sliced) – or about 2 cups sliced
  • 5-10 mint leaves
How to Make It:
  1. Pre-heat oven to 400 F.
  2. Add balsamic to a saucepan and cook over medium heat until reduced by about half. Let cool and it should form into a nice syrup or “reduction.”
  3. Melt honey and add to the balsamic reduction. Stir to combine.
  4. Roll pie crust thin between two sheets of parchment paper. This doesn’t have to be perfect as you’ll press it into your pie dish or tart pan. Make sure you get all the way up to the edges and rim of the pan and spread the dough around evenly.
  5. In a large bowl, mix cut strawberries and balsamic/honey mix. Spread mixture evenly inside crust.
  6. Bake for 25-30 min or until the crust edges turn a nice golden brown. Remove and let cool 10-30 min. 
  7. Cut up mint leaves and sprinkle on top. Serve on its own or with a rounded scoop of vanilla ice cream or coconut sorbet.
Don’t forget, my readers receive 20% off their first 4 From the Farmer baskets with code ‘MOARfit’ at checkout!

Chickpea, Quinoa & Kale Taco Salad + Radicchio Wraps = Super-Bowl

Step up your lunch game with this vegan, gluten-free, Meatless Monday superfood taco salad recipe. Try saying that ten times fast.

If you’re underwhelmed or unsatisfied by your attempts at green salads, don’t throw in the towel on healthier habits. Salads don’t have to be all rabbit food. In fact, adding healthy whole grains, nuts or seeds and legumes to the mix will increase satiety (that feeling of, one, I’ve had enough and, two, it was downright tasty) and decrease the desire to graze after the meal. The fiber, healthy fats and proteins these ingredients bring to the table help improve digestion, stabilize blood sugar and nourish your muscles and mind.

Healthy Taco Salad Wraps

All of the nutrient-dense ingredients (kale, quinoa, chickpeas, etc) in this upgraded taco salad fit into those three categories of superfood add-ons. If you take it a step further and replace your tortilla strips or flour wrap with radicchio leaves, you’re kicking it up to a whole new level of good-for-you. The magenta hue of radicchio comes from a powerful antioxidant and anti-inflammatory pigment called anthocyanin. Anthocyanins are members of the same family of phytochemicals found in teas, honey, wines, fruits, vegetables, nuts, olive oil and cocoa–all of which have received a lot of well-deserved positive buzz from the health and nutrition field. The cherry on top–as well as the moderation factor–are a few coins of baked plantains. It’s amazing how a little something special can take a salad from boring to a monumental taste-bomb of deliciousness.

Healthy Taco Salad Bowl

Raddichio-wrapped Quinoa Kale Taco Salad w/ Spicy Avocado Dressing

Makes 6 servings

What You’ll Need

For the Quinoa Kale Taco Salad:

  • 1 small head of radicchio
  • 1 cup dry red quinoa
  • 6 cups chopped kale (stems removed)
  • 2 cups chickpeas (rinsed and drained)
  • 1 cup corn (canned or frozen works)
  • 1/4 cup raw, unsalted pumpkin or sunflower seeds
  • 1/2 red onion, finely diced
  • 1/2 cup fresh cilantro, finely chopped

For the Spicy Avocado Dressing:

  • 1 ripe avocado
  • Juice of 1 lemon
  • 1/2 cup water
  • 2 large cloves of garlic
  • 1 jalapeno, seeded
  • 1/4 cup fresh cilantro
  • Sea salt and pepper to taste

For the Plantains:

  • 1 plantain
  • 1 tbs olive oil
  • 1/2 tsp sea salt

How to Make It:

  1. Preheat oven to 400 F.
  2. Slice plantains into coins 1/8″ thick and toss in olive oil and sea salt. Place a cooling rack on a baking sheet and lay out a single layer of plantain coins. Bake for 20 min.Turn oven to broil and cook another 5 min, or until light golden brown. Remove and set aside to cool.
  3. While the plantains bake, cook quinoa according to package directions. When it’s done, set it aside to cool.
  4. Bring a large pot of water to a boil. Blanch the kale leaves in boiling water for 1 min, then remove from heat, drain and let cool.
  5. To make the dressing, combine all ingredients in a food processor or blender, mixing until smooth. Taste and adjust seasoning as needed.
  6. In a large bowl, combine quinoa, kale, chickpeas, corn, pumpkin or sunflower seeds, onion and fresh cilantro. Pour dressing on top, to taste, and toss until everything is well coated.
  7. Peel a few leaves of radicchio to line your bowl or layer your plate with. Scoop about 1 1/2 cups of the salad into your bowl or onto your plate. Garnish with a few plantains and enjoy!

Potato Leek Soup w/ Watercress for your Meatless Monday

If you’re looking to join the Meatless Monday movement, or simply cut back on your weekly meat intake, my vegetarian and gluten-free Potato Leek Soup is a tasty way to go. It’s heartiness is also sure to warm you up after that polar vortex that nearly sucked us all into a cold abyss last week. I love this recipe because it’s straightforward, filling, inexpensive and uses seasonal ingredients. I made a similar version (Tri-Color Potato Leek Soup) a year ago and have modified this one with a couple of my favorite super foods: ghee and nutritional yeast.

Ghee is clarified butter originating from India, which has a long shelf life when stored in an airtight container. It’s definitely a process to make, but if you do it with a friend (what’s up, C$!) it can be really fun. Not only is ghee a real food (aka none of that margarine junk), but it’s loaded with health benefits. First of all, it contains Vitamins A (good for the eyes), D (good for the bones), E (good for the skin) and K (good for the heart). These all just so happen to be fat-soluble vitamins and since they’re embedded in this dietary fat your body can readily absorb them. Secondly, ghee provides a cancer-fighting antioxidant named conjugated lineolic acid (CLA), which has been linked to preventing cancer. Lastly, ghee is great for cooking because it doesn’t break down in high heat like many cooking oils (e.g. canola and safflower). When cooking oils break down in high heat they produce free radicals, which damage our cells and DNA leading to mutations that can cause certain diseases. Ghee’s smoking point is between 325°F and 375°F, which is much higher than the smoke point of canola or safflower oil so you’re less likely to run that risk while simply sautéing your onions.

Vegetarians and vegans, if you don’t know about nutritional yeast, you ought to. Why? Well for starters, it is an excellent source of non-animal protein. Drilling down into the details, MindBodyGreen boasts that just two tablespoons of this bizarre but tasty substance (“hippie dust”) contain 9 grams of protein, beating out a glass of whole milk, an egg or an ounce of beef. It’s also a great source of Vitamin B-12, a vital nutrient for your body’s nerve and blood cell health. Most sources of Vitamin B-12 are found in animals, making nutritional yeast an important component of a healthy vegan or vegetarian diet. One tablespoon contains a full day’s supply of  this critical B vitamin.

Before you hit the grocery store to gather the fresh produce you’ll need, support your community by checking the stocks of your local farmers market (if it’s still up and running). Or if you live in the DMV, give Relay Foods a try. I worked with the Relay team on my first MOARfit Nutrition for Athletes Clinic last summer and completely jumped on the bandwagon. Their online grocery store brings the basics, specialty foods and local produce together in one place–i.e. you get convenience and quality, sustainable ingredients. Ok, enough plugging for now. Let’s get on to that recipe….

Potato Leek Soup w/ Watercress 

Potato Leek Soup

What You’ll Need:

  • 1 Tbs coconut oil (or olive oil)
  • 1 Tbs ghee (or unsalted butter)
  • 1 sweet onion, diced
  • 2 stalks of celery, diced
  • 3 leeks, cleaned and cut into 1/4-inch rounds
  • 3 cloves of garlic, crushed
  • 1/2 tsp cayenne
  • Sea salt and pepper, to taste
  • 2 Tbs sherry vinegar
  • 5 medium potatoes (about 5 cups chopped)
  • 6 cups reduced-sodium vegetable stock
  • 1 /4 cup fresh parsley, minced
  • 1/4 cup nutritional yeast*
  • 4-oz fresh watercress (about 3-4 loosely packed cups)

*If you prefer, used a 1/4 cup or Parmesan or Romano cheese instead of nutritional yeast.

How to Make It:

  1. Heat oil and ghee in a large (5-6 qt), heavy pot (I adore using my Cuisinart  Dutch Oven for all soups) over medium heat. Add onions, celery and leeks, sautéing 5-7 min or until tender and translucent.
  2. Add garlic, cayenne and salt and pepper, cooking for another 2-3 min then add your vinegar to deglaze the bottom of the pan.
  3. Add potatoes, making sure to coat them in the spices and onion/shallot/leek mixture.
  4. Add vegetable stock and bring the mixture to a boil, then reduce to a simmer for about 15 min. The potatoes should be easy to pierce and pick up with a fork.
  5. Finally, add in your parsley and nutritional yeast. Using an immersion blender (if you have one), purée the mixture in your pot until smooth.
  6. Adjust your seasoning for spice and saltiness.
  7. Serve with a few tablespoons of chopped watercress and enjoy!

If you want to amp up the Yum Factor (and subsequently deviate from Meatless Monday), add 2 oz of pancetta to the mix after the onion and celery but before the leeks. This will of course remove that vegan and/or vegetarian stamp from the recipe but it does add some depth and richness to the flavor of the soup.

Fennel “Cream” Sauce with Blackened Tomatoes

This week’s recipe for a gluten-free, vegan pasta sauce features hearty, healthy fennel. Fennel is packed with dietary fiber, vitamin C, potassium and manganese, and provides a good amount of folate–a B-vitamin critical for proper function of your nervous system. When munched on raw, it has a light anise flavor that mellows out when cooked.

Fun fact #1: I learned from some family friends who grew up in Europe that the Swiss use raw fennel on veggie platters in place of celery.

Fun fact #2: fennel is one of the primary flavors in absinthe.

I adore the flavor of fennel, raw or not, and always have it on hand during the winter months for frittatas, stir-frys and snack time. What follows is my take on a vegan Fennel “Cream” Sauce. I paired it with gluten-free, quinoa pasta, blacked tomatoes (also included in the recipe) and cast-iron grilled chicken. If you’re aiming to keep this vegan, steer clear of the meat and opt for some cannellini beans instead.

Fennel “Cream” Sauce with Blackened TomatoesFennel "Cream" Sauce with Blackened Tomatoes

What You’ll Need –

For the Fennel “Cream” Sauce:

  • 1 tbs grapeseed oil
  • 1/2 fennel bulb,  plus 1/4 c fronds
  • 1/2 white onion
  • 2-3 cloves garlic
  • 2 tbs sherry or raspberry vinegar
  • Juice of one lemon
  • 1/4 c nutritional yeast
  • 1/4 c olive oil
  • 1/2 tsp turmeric
  • 1/4 tsp cayenne
  • Sea salt and ground pepper to taste

Directions:

  1. Heat grapeseed oil in a frying pan over medium-high heat. Add onions (coarsely chopped) and cook 1-2 min. Add fennel (coarsely chopped) and cook another 4-6 min. Once the onion and fennel have softened (the onions will appear translucent and both vegetables will start to brown around the edges), add your garlic–the cloves can remain whole as you’ll be blending this in a food processor–and cook another minute or so. You should start to see brown bits sticking to the bottom of your pan. So as to keep all that yummy flavor in your sauce, splash a couple tablespoons of sweet vinegar into your pan to deglaze. Give the mixture a stir and remove from heat.
  2. Add mixture to your food processor with the lemon, nutritional yeast. olive oil, turmeric, cayenne, and salt and pepper to taste. Pulse until it’s blended to your preferred sauce consistency.
  3. Pour over cooked, gluten-free pasta or go grain-free with a bowl of hearty winter vegetables or sauteed kale.

For the Blackened Tomatoes:

  • 1 tbs olive oil
  • 1 cup grape tomatoes
  • Sea salt

Directions:

  1. Pre-heat a cast-iron pan over medium-high heat (if you don’t have cast-iron opt for your heaviest frying pan).
  2. Cut tomatoes in half. On the rounded (uncut) side, make a small “X” cut. Drizzle “X” sides with olive oil and sprinkle with sea salt.
  3. Place the tomatoes “X” side down in your preheated pan and let them cook without turning.
  4. After about 2-3 minutes, peel up the edges and look for blackened skin with a little red showing through–and if you aren’t quite there yet, cook them a little longer.
  5. Remove from heat and add to your pasta and sauce mix.

To complete the meal:

  • 1 cup gluten-free pasta
  •  12 oz (or 3/4 lb) protein of choice (I went with free-range chicken)

Directions:

  1. Cook pasta according to package instructions. Drain and set aside.
  2. Fillet the chicken, coat it in some olive oil, salt and pepper (or your favorite marinade), and cook it in the same cast-iron pan (if you have one) as your tomatoes over medium-high heat for about 5 min per side.
  3. Combine pasta with sauce and blackened tomatoes, then top with slices of your chicken (3 oz per person/serving).

{serves 4}

Homemade Hemp Milk Hot Cocoa

qode interactive strata

According to last month’s issue of Outside Magazine, among the many alternatives to cow’s milk, hemp milk tops the charts as the best dairy-free, plant-based alternative. Hemp milk is loaded with heart-healthy omega-3s, athletic performance-enhancing magnesium, disease-fighting beta-carotene, and brain-boosting iron. It’s also the only non-dairy alternative that can be considered a complete protein as it has all 9 essential amino acids. The runners’ up are almond, soy and coconut milk, which each have their own pros and cons. In my humble opinion, if you can get down with the sometimes slightly bitter taste of hemp milk then that is where it’s at, nutritionally speaking.

Lucky for you I have here a homemade hemp milk recipe, naturally sweetened with dates and made more palatable by a touch of vanilla extract (bye-bye bitter). As a holiday bonus, I’ve also included a recipe for Homemade Hemp Milk Hot Cocoa, featuring my new favorite low-glycemic index sugar alternative–raw coconut sugar–which I gushed over in my post on Pumpkin Power Cookies earlier this month.

Homemade Hemp Milk

Homemade Hemp Milk

What You’ll Need:

  • 1 cup hemp seeds
  • 4 cups water
  • 2 medjool dates
  • 1 teaspoon vanilla extract
How to Make It:
  1. Add all ingredients to a powerful blender and mix on high until smooth.
  2. Optional: strain mixture with cheesecloth to remove any clumps if you want your homemade batches to be smooth not pulpy like the store-bought kind.

Hemp Milk Hot Cocoa

Homemade Hemp Milk Hot Cocoa

What You’ll Need:

  • 2 cups homemade or store-bought vanilla hemp milk
  • 2 tbs (heaping) raw cacao powder
  • 2 tbs raw coconut sugar
  • 1 tbs coconut oil
  • 1/2 tsp ground cinnamon
  • 1/4 tsp ground cardamon
  • 1/4 tsp ground nutmeg
  • 1/4 tsp ground cloves
  • 1/8 tsp ground ginger
  • 1/8 tsp ground cayenne

How to Make It:

  1. Heat hemp milk over medium heat to just under a boil.
  2. Remove from stove and add heated hemp milk with all the other ingredients to your blender and blend for a minute, or until smooth.

Serve hot with a side of my Pumpkin Power Cookies or Sweetly Salted Nut Butter Power Cookies for a healthy and festive afternoon snack.

Two-Timing: Sweet or Savory Root Vegetable Pancakes

Seasonal. It’s a word that gets thrown around a lot these days. It’s part of the locavore, slow-food movement–of which I’m a huge fan but not necessarily a devotee. I try to buy produce that is in season, both for environmental and taste reasons. That said, I’ll be the first to admit that I relish the fact that I have the privilege to get avocados and blueberries year-round.

http://www.cuckooforcoupondeals.com/wp-content/uploads/2010/01/Seasonal-food-chart.jpg
Not sure who Leon is, but I love this chart!

One website I love if you are looking to lower you and your family’s dietary impact on the environment and support local farmers is Eating Well’s seasonal food guide. You can even check out what foods are considered seasonal by state–no one size fits all here!

So what’s in season you say? With fresh local veggies and fruits dwindling, root vegetables, tubers and squash should be your nutrient-rich go-tos for the colder months. There are countless ways to incorporate these seasonal staples into your recipe arsenal. From soups to veggie burgers, cooking with root vegetables and potatoes makes hearty, healthy winter meals a breeze.

Shredded sweet potato, parsnip, turnip and carrot

In case you aren’t already sold, check out these nutrition benefits:

  • Since root vegetables are grown underground they absorb a lot of vitamins and minerals from the soil, namely vitamin C, vitamin A (in the form of beta-carotene) and folate, and essential minerals like potassium, phosphorous, magnesium and even iron.
  • All root vegetables are an excellent source of dietary fiber which not only keeps your full for longer, but may also lower LDL cholesterol (the bad kind) and help regulate blood sugar levels. Forbes has a great article on the benefits of a diet high in fiber.
  • Potassium naturally prevents fluid retention and regulates blood pressure.
  • Vitamin C is a powerful antioxidant. It also helps your body absorb iron and make collagen for healthy bones and cartilage.
  • Folate is essential for having a healthy pregnancy and is a key B vitamin for women trying to conceive and those who are already pregnant.
  • Beta-carotene will keep your peepers in top shape as it has been linked to reduced incidence of macular degeneration.

Sweet or Savory Root Vegetable Pancakes

Sweet or Savory Root Vegetable Pancakes

What You’ll Need (Two Ways):

~Each version makes about 10 medium pancakes.~

Sweet (ONE): top w/ a light drizzle of maple syrup

  • 6-8 cups grated root vegetables (I used 1 sweet potato, 2 carrots, 2 parsnips and 2 turnips; other options include celery root and beets)
  • 1/4 cups corn starch or arrowroot powder
  • 1 tsp cinnamon
  • 1 tsp ground ginger
  • 1/2 tsp nutmeg
  • 1/2 tsp cayenne pepper
  • 2 large eggs
  • grapeseed oil for light frying

Savory (TWO):top with a poached egg

  • 6-8 cups grated root vegetables (I used 1 sweet potato, 2 carrots, 2 parsnips and 2 turnips; other options include celery root and beets)
  • 1/4 cups corn starch or arrowroot powder
  • 1/4 cups nutritional yeast or finely grated Parmesan cheese
  • 2 tbs minced chives
  • 1/2 tsp cayenne pepper
  • 2 large eggs
  • grapeseed oil for light frying

How to Make Them:

  1. Grate all vegetables using a sharp cheese grater.
  2. For the Sweet version, mix together in a large bowl with corn starch or arrowroot powder, cinnamon, ginger and cayenne. For the Savory version,  mix together in a large bowl with corn starch or arrowroot powder, nutritional yeast (or grated cheese), chives and cayenne.
  3. In a separate smaller bowl, whip up your eggs.
  4. Pour egg mixture over veggie mix and toss until evenly coated.
  5. Heat 1-2 tbs grapeseed oil in a large frying pan over medium heat.
  6. Scoop out 1/4 cup of the mixture at a time, forming into compact balls with your hands. Place them into your hot pan and flatten each down using a spatula.
  7. Cook over medium heat, 3-5 minutes per side.

Serve immediately. For the Sweet version, plate two or three pancakes and serve with a drizzle of grade A maple syrup (the good stuff!) and a side of turkey bacon or fruit. For the Savory version, try serving two pancakes over a bed of arugula or baby spinach and topping it off with a poached or fried egg.

DIY Gluten-Free Pizza Night

Over the past few years I have watched friend after friend turn gluten-free. Some have tested positive for Celiac Disease. Others simply feel better without gluten (a protein) in their system and likely have some degree of sensitivity or intolerance. I too have ventured down the less-bloated road devoid of bread, pasta and pancakes a time or two. Somehow I always find my way back to the (good) stuff–usually when they bring out the bread basket at a mussel bar.

image (1)

I’ve said it before and I’ll say it again, I’m a big believer in moderation. Many health experts, including  Dr. Alessio Fasano, Director of the Center for Celiac Research at the University of Maryland Medical Center, have concluded that gluten sensitivity exists on a spectrum. More anecdotally, I have experienced first-hand that by completely eliminating the protein from my diet I feel less sluggish, but the moment I slip the inflammatory and energy-zapping effects rebound with a vengeance.

image (2)

My suggestion? Eat everything in moderation (unless you have Celiac). Don’t eat pasta every night. Do eat quinoa–maybe even a few times a week. Be brave and try new grains–think amaranth, millet, buckwheat, etc. And, by all means, treat yourself to pizza every now and again–whether its the regular variety, or my homemade, gluten-free version below.

image

Gluten-Free Pizza Crust

Adapted from: www.glutenfreegirl.com

What You’ll Need:

  • 1 tbs ground flaxseed
  • 2 tbs boiling water
  • 1 cup brown rice flour
  • 1/2 cup garbanzo bean flour
  • 1/2 cup tapioca flour
  • 1 tsp turmeric
  • 2 tsp kosher salt
  • 4 tsp active-dry yeast
  • 1/4 cup olive oil (plus extra for brushing on top of the crust)
  • 3/4 cup warm water

How to Make It:

  1. Mix flaxseed in a bowl with 2 tbs boiling water. Whisk vigorously until it’s a thick paste. Set “slurry” aside to cool.
  2. Combine gluten-free flours, salt and turmeric (for color mainly) into the bowl of a stand mixer. Mix together.
  3. Pour yeast into a separate, small bowl with olive oil and 1/2 cup warm water. Stir and let stand a couple minutes to activate the yeast.
  4. Add slurry to dry ingredients in mixer and mix until combined. Pour yeast/oil/water into dry ingredients. Mix on medium for a minute, or until your dough starts to come together. If your dough is too dry, add remaining 1/4 cup of warm water in small amounts (or more if needed) until the dough feels workable. Remove from mixer, form into a ball and set  aside to rise for 1 hour–covering gently with a damp kitchen towel.
  5. Time to bake! Preheat oven to 450°. If you have a pizza stone or cast iron griddle pan (the smooth side), place it in the oven. If not, sprinkle a baking sheet with cornmeal.
  6. Generously dust a clean surface with cornmeal or gluten-free flour of choice. Roll out dough using a rollin pin dusted with gluten-free flour to your desired thickness (I went with super thin).
  7. To make individual size crusts and speed up the cooking process, use a large canister lid (approx. 6″ in diameter) to cut dough rounds. You may have to clump the scraps together into a ball and roll the dough out a few times to use it all up.
  8. Transfer dough rounds to pizza stone, smooth griddle or prepared tray. Brush the tops with olive oil. Bake until dough has started to crisp and brown around edges, about 4-6 min. Remove from oven. This is your pre-baked pizza crust.
  9. Top with tomato sauce or (my preference) mashed sweet potatoes and your favorite toppings (see suggestions below) and return to oven for another 4-5 min or until the cheese (if it’s on there) is melted.

Suggested Toppings to Please Any Crowd:

  1. Sauteed red onions
  2. Spinach
  3. Sauteed wild mushrooms
  4. Sauteed asparagus, zucchini or squash
  5. Super-thinly sliced eggplant rounds
  6. Roasted garlic
  7. Sun-dried tomatoes
  8. Goat cheese (or your cheese of choice)
  9. Sweet potato puree (literally just mashed, pre-cooked sweet potatoes) – great alternative to sauce!
  10. Prosciutto or small bits of pancetta
  11. Fresh basil
  12. Salt, pepper and a drizzle of good olive oil!