Maple-Apple Cake Donuts

Sure, pumpkin anything is bringing sexy back this fall (and all the falls) but apples have been an autumnal all-star far longer. We could do a comparison table here showcasing everything you can do with apples versus pumpkin and I bet these two tasty ingredients would be neck-and-neck, but that is too much formatting and work for me to handle before my next yoga class (truth be told). So instead, I’m going to tell you about how I turned this delicious Pumpkin Cake Donut recipe from King Arthur Flour into a Maple-Apple Cake Donut using apples I picked from my local Waters Orchard.

Growing up in Massachusetts, my favorite donuts were those powdered cake donuts from Dunkin’ Donuts which inevitably left more sugary dust on your chin and clothes than made it into your mouth. I loved the fluffy texture and sweet remnants you got to lick off your lips after the treat was done. As a nutrition coach, I tend not to eat or recommend too many donuts these days but if you’re going to do it, do it good.

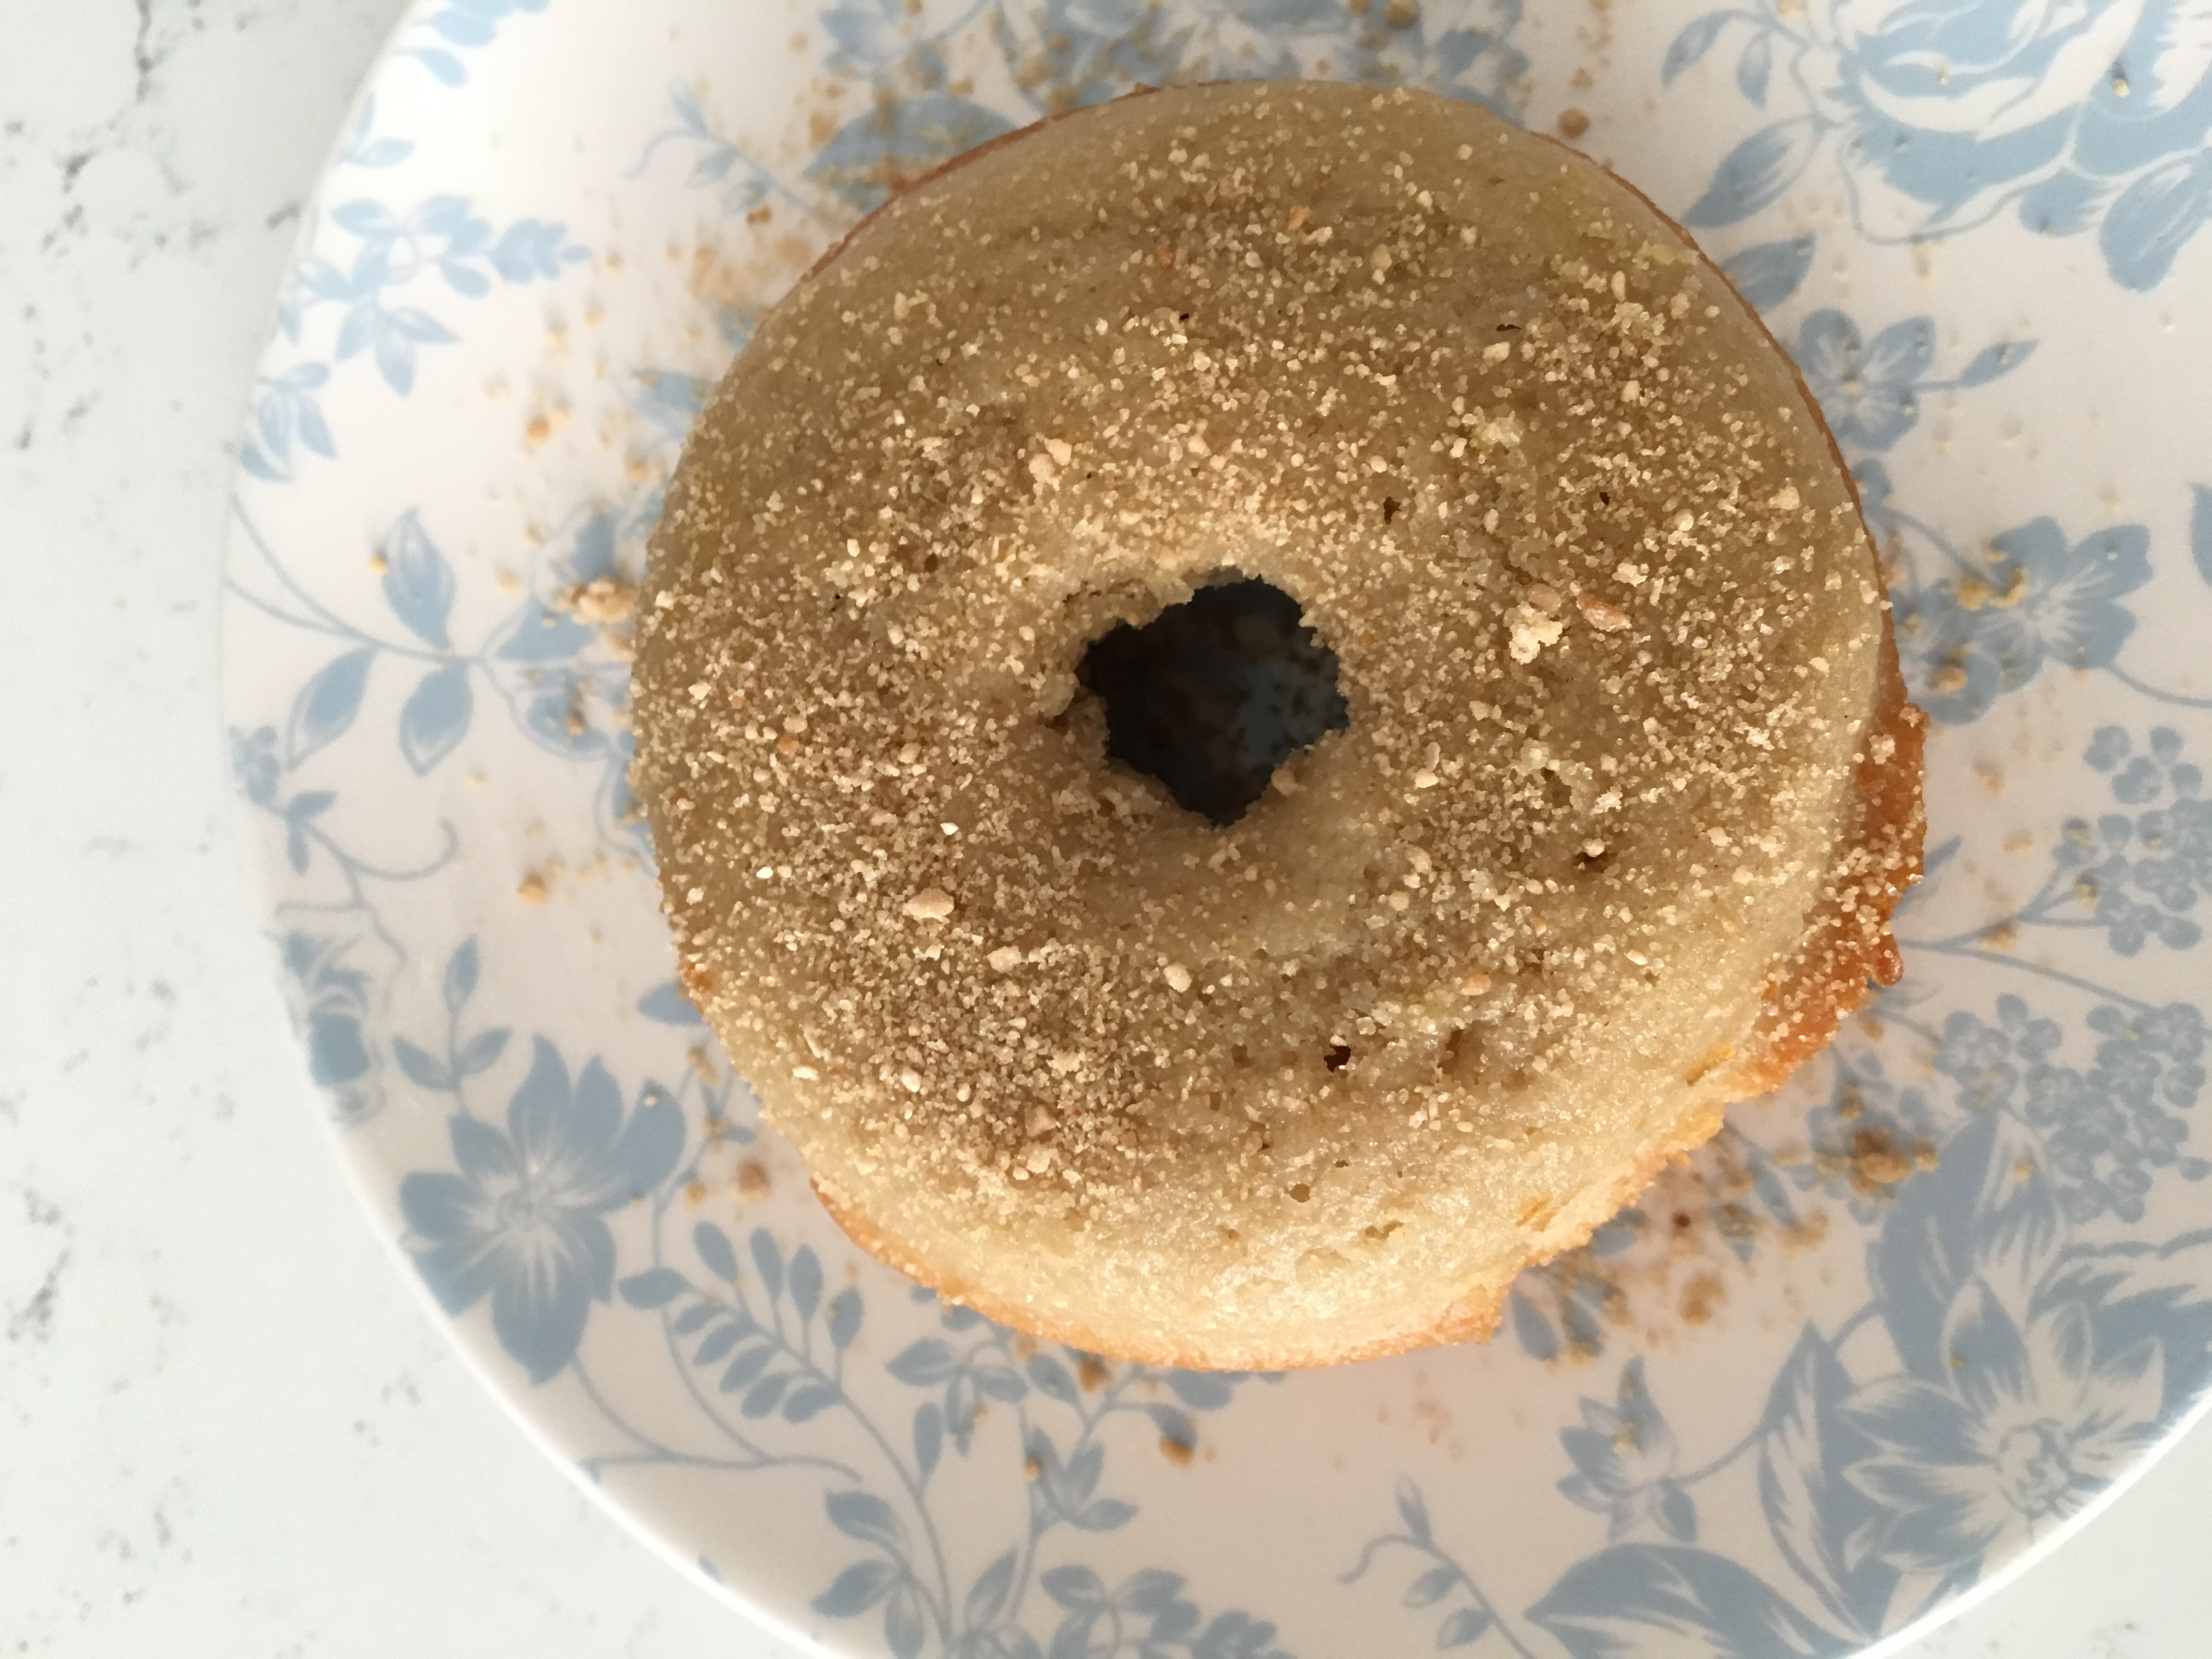
The following Maple-Apple Cake Donut recipe was inspired by sweet apples and a small jar of granulated maple sugar from my parents up in New England. The ingredients did the talking, King Arthur helped me with the baseline, and my creative mind made swaps to cut back on added sugar and fuse these fluffy Os with fall flavor.

Maple-Apple Cake Donuts

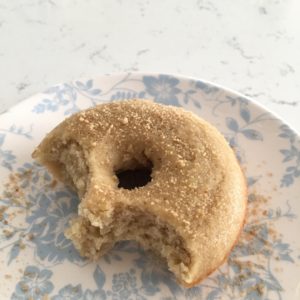
MAPLE-APPLE CAKE DONUTS

Makes 12 donuts

Ingredients:

  • 1/4 cup coconut oil, melted
  • 1/2 stick of butter (or 1/4 cup), melted
  • 3 large eggs
  • 1/2 cup cane sugar
  • 1/4 cup light brown sugar
  • 2 Tbs maple syrup
  • 1 1/2 cups 15-minutes homemade apple sauce (recipe follows)
  • 1 tsp ground cinnamon
  • 1/4 ts ground nutmeg
  • 1/8 tsp ground cloves
  • 1 1/2 tsp fine sea salt
  • 1 1/2 tsp baking powder
  • 2 cups all-purpose flour, level
  • Granulated maple sugar for dusting


Directions:

  1. Preheat the oven to 350°F. Lightly grease two donut pans
  2. In a large mixer, use the flat beater attachment to combine the oil, butter, eggs, sugars, maple syrup, apple sauce, spices, salt, and baking powder until smooth. (You can also do this by hand with a little elbow grease and a whisk). 
  3. Add the flour, stirring just until smooth.
  4. Fill the wells of the donut pans about  to the top but be careful they don’t overflow.
  5. Bake for ~18 minutes, or until a toothpick inserted into the center of one comes out clean. 
  6. Remove from the oven, let cool a few minutes, loosen the edges (if need be) with a butter knife, and gently flip onto a rack to cool. 
  7. While the doughnuts are still warm generously dust them with granulated maple sugar (or cinnamon sugar).
  8. Let cool completely and store at room temperature for several days. I like to place them on a plate, stick them with toothpicks, and tent them with plastic wrap so they have room to breath.


HOMEMADE APPLE SAUCE

Ingredients:

  • 2 extra large or 3 large apples – peeled, cored and chopped
  • 1 tsp brown sugar
  • 1/2 tsp ground cinnamon


Directions:

  1. In a medium microwavable mixing bowl, combine prepped apples with sugar and cinnamon.
  2. Microwave for 3 minutes, stir, and microwave again another 3-4 minutes until apples are soft (not mushy) when pricked with a fork.
  3. Transfer to a blender or food processor and blender until mostly smooth (any little chunks will taste delicious when you bite into them).


Sweet Potato Bean Burgers w/ Maple Chipotle Mayo (Meatless Monday) (GF)

As a flexitarian (aka a conscious and informed omnivore), I am a big believer in avoiding absolutes when it comes to diet choices. I eat meat on occasion. I eat gluten with regularity. And I sometimes even eat dairy (though my system would rather I not). I’ve tried out a lot of different food lifestyles, but I always come back to moderation. In the words of Oscar Wilde, everything in moderation, even moderation. Afterall, who wants to miss out on their mom’s classic sugar cookies at Christmas time, or the sensational experience of sharing pâté and red wine with good friends? The good news is, small dietary tweaks can make an enormous impact, not only on your personal health but on the well-being of our shared environment.

One of these manageable steps stems from a movement called Meatless Monday (#meatlessmonday). According to their website:

Meatless Monday is a non-profit initiative of The Monday Campaigns, in association with the Johns Hopkins’ Bloomberg School of Public Health. We provide the information and recipes you need to start each week with healthy, environmentally friendly meat-free alternatives. Our goal is to help you reduce your meat consumption by 15% in order to improve your personal health and the health of the planet. Presidents Wilson, Truman and Roosevelt galvanized the nation with voluntary meatless days during both world wars. Our intention is to revitalize this American tradition. We’re spearheading a broad-based, grassroots movement that spans all borders and demographic groups. By cutting out meat once a week, we can improve our health, reduce our carbon footprint and lead the world in the race to reduce climate change.

Sign me up! I’m already more like a Meatless Monday-through-Friday kind of gal, but if you aren’t this is one small change anyone can make. To jump-start your commitment to being healthier and helping the planet, try out this recipe for Sweet Potato Bean Burgers, or check out my Quinoa Black Bean Zucchini Burgers from last fall.

image

Sweet Potato Bean Burgers

What You’ll Need:

  • 2 large sweet potatoes
  • 1 can white cannellini beans
  • 1/4 cup gluten-free oats
  • 1/4 cup garbanzo bean flour
  • 2 tbs olive oil
  • 1/2 sweet onion
  • 4 small or 2-3 large cloves garlic
  • 1 tsp cumin
  • 1/2 tsp cayenne
  • 2 eggs
  • 2 tbs chives
  • 2 tbs sauce from a Chipotle Peppers in Adobo Sauce can
  • salt and pepper to taste

How to Make Them:

  1. Polk holes into sweet potatoes with a fork and microwave each individually on high for 5 min. Remove and let cool for 10 min before attempting to peel.
  2. While  the potatoes cool. in a large pan heat olive oil over medium heat. Add onion and saute for about 5 min until soft and translucent. Add minced garlic and spices cooking until fragrant (another 2 min).
  3. Peel sweet potatoes and cut into 1″ or smaller cubes. Add to pan and cook another 5 min until tender. Remove mixture from heat.
  4. In a separate bowl, beat two eggs until smooth.
  5. In a food processor, combine sweet potato mixture, white beans (drained and rinsed), oats, garbanzo bean flour, adobo sauce, finely chopped chives, and salt and pepper to taste with egg mix.
  6. Chill mixture in refrigerator for 30 min then remove and form into 6 burger patties. And pre-heat oven to 350ºF.
  7. In the same large pan used earlier, sear your burgers on both sides for 2-3 min over medium-high heat in a little more olive oil. Then bake in a pre-heated 350ºF oven for 30 min (flipping once).

Maple Chipotle Mayo

What You’ll Need

  • 3/4 cup light organic mayo
  • 1 tbs pure maple syrup
  • 2 chipotle peppers in adobo sauce

How to Make It: Blend all ingredients together in a mini food processor (or Magic Bullet!) until combined. Chill until ready to use.

Powered by Linky Tools

Click here to enter your link and view this Linky Tools list…

Saffron Fennel Bread

For the past 6 months, I have had a little golden packet of a special spice called saffron staring back at me from my kitchen cabinet. Saffron has a complex flavor that is often used in French bouillabaisse, Spanish paella, Milanese risotto, and many Middle Eastern dishes. I called it a “special” spice because not only is it quite pricey, but a little goes a long way when it comes to Saffron’s audacious effects on the palette.

image_1

Good news for all you natural remedy lovers out there! According to my girl Oprah, a 2008 study found that 76% of women who took daily saffron supplements reported a 50% drop in PMS symptoms like mood swings and fatigue (your welcome, in advance to the men in our lives). The spice has also been linked to the alleviation of mild to moderate depression. According to another study, saffron supplements were as effective as a common antidepressant in reducing symptoms related to depression.

This taste tantalizing and feel-good spice met its maker last weekend when I decided to dust off my dutch oven and get back to my bread baking roots. It all started because I realized I was in need of some bread to accompany two upcoming recipes–my meatless Monday Sweet Potato Bean Burgers with Maple Chipotle Mayo, and my slow-cooker Tuscan Lentil, Barley, and Kale Soup. Rather than running out to the store for a pre-made loaf, I got out my flours and yeast and got to cooking. I’ve been enjoying the bread for the last week and saved half in the freezer for when my schedule gets hectic with work travel. Give it a go and add a little something “special” to your sandwich or soup entree.

Saffrom Fennel Bread

What You’ll Need:

  • 1 1/4 cups warm water
  • 1 tbs active dry yeast (or one packet)
  • 1 tablespoon raw cane or coconut sugar
  • 2 cups unbleached, bread flour (plus a little more for kneading)
  • 1 cup whole wheat flour
  • 1/2 tbs kosher salt
  • 1 tbs whole fennel seeds
  • 1/8 tsp ground saffron
  • 1/4 cup cornmeal (for coating)

How to Make It:

  1. In a large bowl, mix water, yeast, and sugar. Add 1 cup of bread flour and stir until blended.  Wait 5 minutes.
  2. Once the mixture is slightly foamy, add salt, fennel seeds (crushing them lightly in your hand as you sprinkle them in), and saffron, and stir to blend. Add remaining cup of bread flour and all the whole wheat flour, little by little.  Mix the dough until it is too stiff to stir with a spoon.
  3. Place your dough on a lightly floured work surface and knead with your hands, adding additional bread flour when the dough gets too sticky. Knead until dough is smooth and consistent in texture, about 8-10 minutes.
  4. Place dough in a clean bowl, cover with plastic wrap, and let rise at room temperature until doubled in size (approx. 1 hour).
  5. Dust a baking sheet with cornmeal. Punch down the dough while still in its bowl, then form it into a firm ball and set on baking sheet. Cover with a dry cloth and let rise again until doubled in size (approx. 1 hour).
  6. About 40 minutes into the second hour, preheat the oven to 400°F with your dutch oven inside.
  7. 20 minutes after preheating, give your dough a good coating of cornmeal allover, then place it in the center of your (hot!) dutch oven. Bake bread covered for about 35 minutes, then uncovered for an additional 10 minutes or until golden brown. Set on a rack to cool for at least 20 minutes before slicing.

MOAR’s Healthy GB Fries w/ Lemon Aioli

Inspired by a recent article in the NYT by one of my food idols, Mark Bittman, I decided to break open my glass jar of garbanzo bean (GB) flour and make something out of the ordinary. I purchased the flour a while back because I loved the idea of using it as an alternative to white or wheat. GB flour is not only gluten-free but has 21% of your DV for dietary fiber, 10% of your iron, and 6g of protein per serving. Compare that to whole wheat flour’s 12%, 8%, and 4g respectively (white flour doesn’t even hold a candle), and GB flour takes the perverbial cake.

Don’t get my wrong, these babies are still fried (though grapeseed oil keeps them light and crispy) but they’re an excellent nutritional alternative to the golden arches or BK. Give them a try and I promise you won’t want anything to do with the French kind.

Garbanzo Bean Fries w/ Lemon Aioli

IMG_4051

What You’ll Need:

  • 1 1/2 cups garbanzo bean (GB) flour
  • 3 cups water
  • 2 tbs olive oil
  • 2 tbs Herbes de Provence
  • Salt & pepper (to taste)
  • Grapeseed oil (amount depends on pan size, for frying)

How to Make Them:

  1. Grease an 8-by-8 baking dish with some oil or spray.
  2. Boil 3 cups of water in a medium saucepan.
  3. Put the GB flour in a large bowl and when the water comes to a boil, slowly add it to the bowl. Whisk constantly as you pour to prevent lumps. (Tip: you can also do this in a KitchenAid standing mixer if you have one. If you do it by hand–as I did in the featured photo–the batter will inevitably have a lump or two.)
  4. Scrape the mixture back into the same saucepan you used, add a little salt and pepper, and bring it to a boil (it should take just a couple minutes). Reduce it to a gentle simmer, add in the 2 tbs of olive oil, and cook for one more minute.
  5. Scoop your doughy mix into the baking dish and spread it into an even layer, which should be about 1/4-1/2 inch thick. Let it cool all the way then cover it with plastic wrap. Refrigerate for at least an hour or as long as a day.
  6. Heat at least 1/4 inch of grapeseed oil in a large skillet over medium. Let it heat until a drop of water makes the oil hiss and spit (stand back!).
  7. Slide the chilled dough out onto a cutting board (this is why you greased the pan) and slice the GB mixture into the shape of fries. These don’t have to look perfect–think handcut or as my Italian familia would say, al rustico! Pat dry with a paper towel to remove any excess moisture.
  8. Working in batches, gently sliding them into the hot oil. Nudge them around occasionally until they’re golden all over, cooking for about 4 to 5 minutes.
  9. Transfer your fries to paper towels (removing the excess oil) and immediately sprinkle with salt, pepper and Herbes de Provence. Serve immediately for the tastiest results.

Lemon Aioli

What You’ll Need:

  • 1 cup organic mayonaise (you can go reduced fat here if you like)
  • Zest of one lemon
  • Juice of half a lemon
  • 2 cloves of garlic

How to Make It:

  1. Combine all ingredients in a food processor and pulse until the garlic is well-blended. If you don’t have a food processor, you can easily do this by hand–just mince the garlic before mixing.
  2. Cover and let marinate in the refrigerator for at least one hour.

My GB Fries and Lemon Aioli make for a great appetizer or side dish to my homemade Quinoa Black Bean Zucchini Burgers. Enjoy these tasty bites with no guilt and maybe even your favorite icy brew. A wise woman once said: “everything in moderation, including moderation.”

Sunday Spread: BBQ Pulled Chicken w/ Asian Broccoli Slaw & Kale Chips

A couple of weeks ago, I wrote about my Jerk Chicken Sunday Spread. Well with NFL playoff season in full swing–GO PATS!–I decided y’all might enjoy another modified comfort food recipe, and one that will keep your guests happy and healthy. This Sunday Spread is tailgate-inspired with its sandwich, slaw and chip combo. The recipes are nutrient-dense and tasty as can be…leaving a little wiggle room for some of my signature perfect Manhattans (*insert devilish grin here*).

For starters, homemade BBQ sauce is the way to go. Not only do you know exactly what you’re eating and avoid a lot of preservatives, but you also get to control the acidity, sweetness and spice levels. At 32 g of lean protein per serving, the chicken in these sammys gives you a good dose of your recommended dietary allowance (RDA) of protein–which for adult women is 46 g and adult men 56 g. Cruciferous vegetables like the broccoli and kale used in these side dishes are packed with disease-fighting nutrients, including several carotenoids, vitamins C, E, and K, folate, and dietary fiber.

Get to cookin’ and enjoy this football-friendly Sunday spread, guilt-free!

IMG_2786

SLOW-COOKER BBQ PULLED CHICKEN

What You’ll Need:

  • 2 lbs chicken (about 4 chicken breasts or 5 chicken thighs)
  • 1 white onion, diced
  • 4 cloves garlic, minced
  • 3/4 cup all-natural ketchup
  • 1/4 cup sun-dried tomato paste
  • 1/4 cup apple cider vinegar
  • 2 tbs chili powder
  • 1 tbs brown sugar
  • 1 tbs Worcestershire sauce
  • 1 tsp dry mustard
  • 1 tsp smoked paprika
  • 1 tsp cumin
  • 1/4 tsp allspice
  • 1/4 tsp cinnamon
  • 6 whole wheat sandwich rolls

How to Make It:

  1.  Grab a mix bowl and combine the garlic, ketchup, tomato paste, vinegar, brown sugar, Worcestershire sauce, mustard, paprika, cumin, allspice and cinnamon. Give it a good whisk until smooth and well blended.
  2. Add your chicken breasts or thighs in a single layer at the bottom of your slow cooker. Sprinkle the diced onions evenly overtop. Pour your BBQ sauce mixture on top, cover and set heat to low. Let cook for 4-5 hours like this.
  3. Remove chicken from slow cooker. The chicken should be pretty much cooked-through, but now it’s time to shred. Using two forks, gently pull apart the chicken into stringy pieces and/or small chunks. Once you’ve shredded the lot, add it back to the sauce in your slow cooker and cook another 1-2 hours.

ASIAN BROCCOLI SLAW

What You’ll Need:

  • 1 package pre-shredded broccoli slaw mix (your could use the cole slaw mix here as a substitute or shred your own cabbage and carrots)
  • 2 tbs green onions, sliced thin
  • 2 tbs fresh cilantro, minced

For the dressing:

  • 2 tbs sesame oil
  • 2 tbs low sodium soy sauce
  • 2 tbs honey
  • 1 tbs rice vinegar
  • 1 tbs lemon juice
  • 1 tbs fresh ginger, grated

How to Make It:

  1.  Whisk all dressing ingredients together in a large mixing bowl. Add slaw mix, green onions and cilantro. Toss together until well-coated and combined. Cover and refrigerate for at least 1 hour before serving.

BBQ-INSPIRED KALE CHIPS

What You’ll Need:

  •  1 head kale (whatever variety you like best)
  • 3 tbs olive oil
  • 1 tsp dry mustard
  • 1 tsp chili powder
  • 1/2 tsp smoked paprika
  • 1/2 tsp cumin
  • 1/2 tsp allspice
  • salt and pepper, to taste

How to Make Them:

  1. Pre-heat over to 300°F. Wash, stem and cut kale into bite size pieces.
  2. Toss kale and olive oil together in a large mixing bowl. Sprinkle spices as evenly as possible over the kale then mix thoroughly with your hands, massaging the kale, for 1-2 min. 
  3. Place wire cooling racks on two cookie sheets. Spread coated kale leaves over both wire racks. (Note: the wire cooling racks allow heat to crisp the kale from top and bottom. Without this added elevation your chips will be soggy and oily.) Bake for 20-30 min depending on the oven. Keep an eye on them for the last 10 min or so to ensure they don’t burn.
  4. Remove from oven, flake them into a bowl and enjoy!

Sunday Spread: Jerk Chicken, Spicy Beans

As a nutrition nut and yogini, I am all about healthy eating. Every now and again, however, comfort food is 1000% necessary. In a lot of families, it’s a tradition to have Sunday suppers that are more bountiful and indulgent than your average dinner. The other weekend, I tackled my own Sunday spread to impress a lucky gent, making Roasted Jerk Chicken for the first time with a side of Spicy Beans (recipes below). I also made some fried plantains, which were a tasty treat and great balance to the serious spice going on in this meal.

Though I’m deeming this a meal to have in moderation, there is still a whole lot of good nutrition going on here. The beans are full of dietary fiber, the tomatoes and tomato paste are a good source of heart-healthy and cancer-fighting lycopene, and the chicken is, of course, a great source of lean protein. And since you’re making it from scratch, you have complete control over the quality of your ingredients. Skip the fried plantains and the meal is overall quite healthful.

We enjoyed this with a bottle of Torrontés, a white wine from Argentina and currently my favorite for fish and chicken dishes. Pinot Grigio would be a comparable pairing if that’s more your style.

IMG_2423

ROASTED JERK CHICKEN

What You’ll Need:

  • 1 medium onion, coarsely chopped
  • 1 shallot, coarsely chopped
  • 5 cloves garlic, coarsely chopped
  • 3 habanero chili peppers, stemmed and seeded
  • 2 large limes, juiced
  • 2 tbs soy sauce
  • 3 tbs olive oil
  • 1 tbs salt
  • 1 tbs brown sugar, packed
  • 2 tbs fresh thyme leaves
  • 2 tsp Jamaican allspice
  • 2 tsp ground black pepper
  • 1 tsp nutmeg
  • 1 tsp cinnamon
  • 1 whole chicken

How to Make It:

  1. Blend all ingredients (except chicken) together in a blender until smooth.
  2. Place the chicken in a shallow roasting pan and cover thoroughly with marinade, rubbing it into all the nooks and crannies.
  3. Cover with plastic wrap and let marinate in the fridge for at least 1 hour, or as long as overnight. Remove from fridge and let sit at room temp for 1 hour prior to roasting.
  4. Preheat oven to 450° F (230° C) and cook chicken for 10-15 min. Then reduce temperature to 350° F (175° C) and roast for an additional 20 min per pound.
  5. Remove and let sit for at least 10 min before carving up.

SPICY BEANS

What You’ll Need:

  • 2 tbs olive oil
  • 1 medium onion, diced
  • 1 shallot, diced
  • 3 cloves garlic, minced
  • 1 15-oz can red kidney beans, drained and rinsed
  • 1 15-oz can white kidney beans, drained and rinsed
  • 1  15-oz can fire-roasted tomatoes
  • 1/3 cup tomato paste
  • 1 tsp paprika
  • 1/2 tsp chipotle pepper flakes
  • 1/2 tsp cayenne pepper
  • 2 tbs fresh thyme
  • 1 tsp dried oregano
  • 1 tsp salt
  • 2 tsp hot sauce (I like Frank’s Red Hot)

How to Make It:

  1. Heat olive oil in large saucepan over medium-high heat. Add onions and shallots and sauté until translucent, about 5 min.
  2. Add garlic and spices (paprika, chipotle pepper flakes, cayenne pepper) and reduce heat to medium, cooking for another 2-3 min.
  3. Add tomato paste, fire-roasted tomatoes (and liquids), and both kinds of beans. Add herbs (thyme and oregano).
  4. Bring mixture to a boil, then reduce heat to simmer. Add salt and hot sauce and let the ingredients cook on low heat for 45 min-1 hour (you can let this sit while the chicken is roasting).
  5. Taste for seasoning and adjust.

Get yourself a plate and pick your favorite cuts of chicken. Serve with a side of Spicy Beans over brown rice and enjoy!

10-Day Cleanse: The Recap

For those of you that did this cleanse, kudos. It’s not easy to follow such a strict diet for 1 day let alone 10–not to mention all of the advance planning, grocery shopping and cooking involved!

I designed this cleanse as a way to strip down what you put into your body and re-start your daily nutritional intake with a clean slate. As you gradually add back in various foods, you gain a better awareness of what energizes your body and makes you feel your best. Some of you may have noticed that your body functions better on less caffeine, less gluten, and/or less meat. Or perhaps you realized the opposite–that your energy levels were far better with coffee, bread and/or animal proteins. Whatever the outcome, doing this helps us tune into our bodies and better understand how to strike the balance between what we crave and what truly nourishes us.

I did not design this cleanse for weight loss, and while you may drop a few LBS if you follow through with it, it’s not about that. If you want to slim down, I’m a firm believer in combining regular exercise and healthy eating as part of your lifestyle. Any cleanse is a temporary intervention, and in this case a reset for your body’s daily dietary intake. In other words, it’s not a panacea. By removing the processed foods, added sugars and salts, and copious quantities of meat with which we so often inundate our bodies, you can begin to understand exactly what your body needs versus what boredom, sadness, and many other emotional drivers tell us it wants.

I’m a big believer that food should be enjoyable but hopefully those of you who try this cleanse will attest that these recipes are pretty darn tasty. I’m not saying you have to eat a vegetarian, gluten-free, dairy-free diet to be healthy–because let’s face it, you’d miss out on a lot of amazing eats that way–but hopefully this will empower you to make better choices for you and your body long term.

One last thing I wanted to share based on my experience with this cleanse, pay attention to my initial warning and do not work out during the first 2 days of this cleanse as there is little to no protein to help you rebuild your muscles. I don’t want you doing damage to your body by improperly preparing it for exercise and recovery. If you feel the need to work out days 1-2, do some restorative yoga, stretching, or take a long walk.

If you did try out this cleanse I’d love to hear from you. What was your experience like? What changes did you notice in your body? Would you recommend this to a friend?

10-Day (Moderate) Cleanse

I’ve wanted to try a detoxifying cleanse for some time now, but just couldn’t wrap my head around trying to function while only consuming some purportedly magical concoction of water, lemon, maple syrup and cayenne pepper in an attempt at pursuing the so-called  Master Cleanse. If you’re like me and lead an active and busy lifestyle, it would be nearly impossible to follow most detox programs without feeling drained or hangry the entire time.

Moderation and feasibility in mind, I’ve devised a cleanse that keeps it real and keeps you functional.  I am not a nutritionist (yet!) or doctor, but I have done my fair share of research. The first two days of this cleanse are 100% raw–intended to scrub out your digestive track the natural way–and all but the final day are in keeping with a vegan diet.

This is a great way to give your system a reset as the seasons change. That being said, while following this please listen to your body. It’s normal to feel hungry at times (especially during days 1-4), but do not starve yourself. If your body is telling you to increase portion sizes, do it. Also, WARNING: do not work out during the first two days of this cleanse as there is little to no protein. I don’t want you doing damage to your muscles. If you desperately need to exercise days 1-2, do some restorative yoga, stretching, or take a long walk. Mainly, avoid any high-impact activities, weight training, or isometric training.

THE PROGRAM:

(The meals below are guidelines. Feel free to use the fruits, veggies, nuts, and whole grains you like best. For example, if you can’t find kale, use any other dark leafy green.)

Day
           Allowed Suggested Meals
1 whole fruits &veggies
  • Breakfast: blueberry beet smoothie w/ grated ginger and lemon
  • Snack: apple w/ cinnamon
  • Lunch: baby arugula w/ mushrooms, grape tomatoes, cucumbers, yellow bell peppers, carrots
  • Snack: ½ avocado w/ apple cider vinegar
  • Dinner: ½ roasted squash w/ diced onions & cayenne inside; steamed broccoli
  • Dessert: 5-6 figs (or any sweet, whole fruit)
2  whole fruits &veggies
  • Breakfast: blueberry beet smoothie w/ grated ginger and lemon
  • Snack: apple w/ cinnamon
  • Lunch: baby arugula w/ mushrooms, grape tomatoes, cucumbers, yellow bell peppers, carrots
  • Snack: ½ avocado w/ apple cider vinegar
  • Dinner: ½ roasted squash w/ diced onions & cayenne inside; steamed broccoli
  • Dessert: 5-6 figs (or any sweet, whole fruit)
3 whole fruits &veggies; and seeds & nuts
  • Breakfast: pineapple banana kale smoothie w/ ground flaxseed
  • Snack: orange slices
  • Lunch: baby spinach, 2 tbs walnuts, 1 tbs pumpkin seeds, strawberries, mushrooms
  • Snack: ¼ cup raw almonds (unsalted)
  • Dinner: grilled eggplant, portobella mushroom, and red pepper skewers; side spinach salad w/ sunflower & pomegranate seeds (apple cider vinegar for dressing)
  • Dessert: raspberries (or any sweet, whole fruit)
4  whole fruits &veggies; and seeds & nuts
  • Breakfast: pineapple banana kale smoothie w/ ground flaxseed
  • Snack: orange slices
  • Lunch: baby spinach, 2 tbs walnuts, 1 tbs pumpkin seeds, strawberries, mushrooms
  • Snack: ¼ cup raw almonds (unsalted)
  • Dinner: grilled eggplant, portobella mushroom, and red pepper skewers; side spinach salad w/ sunflower & pomegranate seeds (apple cider vinegar for dressing)
  • Dessert: raspberries (or any sweet, whole fruit)
5 whole fruits &veggies; and seeds & nuts; and beans
  • Breakfast: mixed berries w/ 2 tbs soaked chia seeds, slivered raw almonds, and almond milk (substitutes: coconut, soy or hemp milk )
  • Snack: apple w/ cinnamon
  • Lunch: arugula w/ roasted root veggies (roasted w/ only coconut oil)—carrots, parsnips, sweet potato, red onion
  • Snack: baby carrots & homemade white-bean hummus
  • Dinner: warm lentil salad w/ chickpeas
  • Dessert: ½ mango w/ cayenne (optional)
6  whole fruits &veggies; and seeds & nuts; and beans
  • Breakfast: mixed berries w/ 2 tbs soaked chia seeds, slivered raw almonds, and almond milk (substitutes: coconut, soy or hemp milk )
  • Snack: apple w/ cinnamon
  • Lunch: baby arugula w/ roasted root veggies (roasted w/ only coconut oil)—carrots, parsnips, sweet potato, red onion
  • Snack: baby carrots & homemade white-bean hummus
  • Dinner: warm lentil salad w/ chickpeas
  • Dessert: ½ mango w/ cayenne (optional)
7  whole fruits &veggies; and seeds & nuts; and beans
  • Breakfast: mixed berries w/ 2 tbs soaked chia seeds, slivered raw almonds, and almond milk (substitutes: coconut, soy or hemp milk )
  • Snack: apple w/ cinnamon
  • Lunch: baby arugula w/ roasted root veggies (roasted w/ only coconut oil)—carrots, parsnips, sweet potato, red onion
  • Snack: baby carrots & homemade white-bean hummus
  • Dinner: warm lentil salad w/ chickpeas
  • Dessert: ½ mango w/ cayenne (optional)
8  whole fruits &veggies; and seeds & nuts; and beans; and whole grains
  • Breakfast: oatmeal (or quinoa) w/ fresh blueberries, cinnamon, 2 tbs chia seeds (or ground flaxseed) and 1 tsp maple syrup
  • Snack: orange slices
  • Lunch: kale salad w/ chickpeas
  • Snack: ½ avocado w/ apple cider vinegar
  • Dinner: warm quinoa salad w/ grilled eggplant
  • Dessert: ½ mango w/ cayenne (optional)
9  whole fruits &veggies; and seeds & nuts; and beans; and whole grains
  • Breakfast: oatmeal (or quinoa) w/ fresh blueberries, cinnamon, 2 tbs chia seeds (or ground flaxseed) and 1 tsp maple syrup
  • Snack: orange slices
  • Lunch: kale salad w/ chickpeas
  • Snack: ½ avocado w/ apple cider vinegar
  • Dinner: warm quinoa salad w/ grilled eggplant
  • Dessert: pear slices (or any sweet, whole fruit)
10  whole fruits &veggies; and seeds & nuts; and beans; and whole grains; and eggs
  • Breakfast: egg-white omelette with spinach, tomato, mushroom & spices; ½ avocado sliced
  • Snack: ½ cup mixed berries
  • Lunch: kale salad w/ chickpeas
  • Snack: ¼ cup raw almonds (unsalted)
  • Dinner: warm quinoa salad w/ 1 poached egg
  • Dessert: pear slices (or any sweet, whole fruit)

Suggested Shopping List:

  • Salad greens: baby arugula and spinach
  • Salad fixings: mushrooms, (grape) tomatoes, cucumbers, bell peppers (any color), carrots, avocados, and any other raw veggies you like
  • Meaty veggies: eggplant, portobello mushrooms
  • Fruits: blueberries, strawberries, raspberries, bananas, apples, oranges, mangoes, pineapple, pears, peaches, plums, figs, etc
  • Hearty greens: kale (mustard greens, collard greens and swiss chard work too)
  • Root vegetables: parsnips, turnips, sweet potatoes, beets, carrots
  • Squash: butternut and acorn
  • Nuts (all unsalted, raw): almonds and walnuts preferrably
  • Seeds (all unsalted, raw): pumpkin, sunflower, chia (whole or ground), flax (ground)
  • Whole grains: quinoa and oatmeal (other good ones include faro & barley)
  • Proteins: pinto, kidney, black, or butter beans; lentils; chickpeas; eggs
  • Flavoring: onions, garlic, ginger, cinnamon, cayenne pepper, and any other spices you like
  • Acids: lemons, apple cider vinegar
  • Oils: coconut oil (or cold-pressed extra virgin olive oil if you can’t find that)
  • Sweeteners: maple syrup (or raw honey)
  • Beverages: unsweetened green, white, and herbal teas; water!
  • Liquids: almond, hemp, coconut or soy milk

The No-Nos:

  • Salt
  • Coffee and black tea
  • Sugar (except small quantities of maple syrup or raw honey)
  • Oils (except small quantities of coconut oil or cold-pressed extra virgin olive oil)
  • Refined Starches (a.k.a. “empty calories” like white bread)
  • Booze (sorry kids–if you need a little sauce before going out, try kombucha)

I’ll be sharing recipes and insights over the course of the next 10 days, so stay tuned!

Finding Balance Anywhere

Flipped Dog in SFO’s Yoga Room

For those of you who have been known to wake up in cold sweats because your life feels dangerously akin to George Clooney’s in “Up in the Air,” this post is for you.

One of my favorite things about my current job is how much I get to travel. It is also the greatest challenge to my personal commitment to leading a healthy and active lifestyle. No matter how good my intentions are to maintain a workout routine and nutritious diet while on the road, I have a hard time sticking to it. Honestly, it’s hard to find time between meetings and emails to fit in your fitness. And when your job involves networking events and client dinners as mine does, it’s not always so easy to resist temptation when the friendly waiter offers you another yummy cocktail or the dessert menu.

So how do you avoid blowing all your hard work in a week or two on the road? Find balance.

First of all, do what you can, when you can. Over the course of the last two weeks on the West Coast I managed to go for two runs, attend one yoga class, do a 30-minute yoga podcast, fire-up my Jillian Michael’s “Butt & Thighs” DVD twice, and get my ass kicked in my first TRX circuit training workout (so much fun!). Not bad, but not my normal regime. Each of these activities took 30 minutes to an hour–i.e. long enough to maintain my fitness level but not so time-consuming that they threw off my tight meeting schedule.

Second of all, be compassionate with yourself. It’s easy to start feeling guilty for a few days without a workout or splurging on that delicious huevos rancheros with a side of bacon at breakfast, but cut yourself some slack. Always keep in mind that life is to be enjoyed–remember moderation–and stressing won’t do you any good. In fact, it activates Cortisol, a hormone found in your body which makes you store fat, in particular around that muffin top/love handle area–fun fun! So relax because we all fall off the horse at times. The important thing is that you don’t throw in the towel just because you let yourself indulge a little in that bomb brunch or red velvet cupcake. Rather than wallowing in self-judgment after an indulgence, get up and go for a long walk or skip the elevator and take the stairs. Balance.

Finally, be creative. While it is important to work physical activity into your busy days and be forgiving of occasional gluttony when you’re on the road, it’s also important to take advantage of opportunities to be good to your body. Case in point, San Francisco International Airport’s “Yoga Room.” Not every airport or city will have a tranquil space devoted exclusively to yogis just after getting through security, but when it’s there, you best use it! Since I always travel with my yoga mat as carry-on–and tend to be in Lululemon pants and slouchy tops on my travel days–I was prepared to capture this golden opportunity and get in 45 minutes of playful flow before heading to my gate. My 5+ hour flight back to DC was so much more manageable having had the opportunity to move and stretch beforehand.

Whatever you do, wherever your busy life takes you, be kind to yourself—both in body and mind. You’ll come home feeling much happier, relaxed and prepared to take flight again.

Lean, Mean Moderation

In a recent yoga training, we discussed in-depth the concept of duality. In the context of spirituality, it is often synonymous with a dichotomy such as right versus wrong, or good versus evil. Yoga—which literally means to “yoke”—is all about overcoming these everyday dualities through union. Broadly extrapolating this concept, I’d say we create these black and white scenarios in all aspects of our lives. Consequently, our understanding of things like good nutrition and optimal exercise becomes limited to extremes, and excludes the important acknowledgment and application of moderation. Moderation is a theme I will often come back to in this blog. On this sunny fall afternoon, however, I’d like to focus in on protein and carbs.

In the health world, more often than not, carbs are demonized as the enemy of a lean, mean physique. Diets like Atkins and South Beach expound varying degrees of anti-carb sentiments. From the kitchen in my office to the lounge area at my yoga studio, I overhear people all the time boasting about how they haven’t touched a carb in a week, or ate nothing but chicken breasts and steamed broccoli for dinner last night (boring!). Their audience inevitably nods in complicit condemnation of these evil nutrients and most likely has gnawing guilt over the delicious Taylor’s sub or Georgetown cupcake they devoured that day.

Credit: Dave Dreas

Here’s where I’d like to weigh in: carbs are not the enemy. In fact, I hate to break it to you, but carbs, fat and protein can all make you gain weight. That’s because our cells can only take so much of any one nutrient before they reach capacity and store the surplus as fat. Therefore carbs are not necessarily the culprit. Instead, overeating–i.e. excess calories–is what’s gonna get you every time. Moreover, if you’re an athlete, or do daily endurance or high-intensity exercise, your body needs carbs. They are the body’s first go-to for energy when you hit the field, pavement or mat and will be key to your performance.

That being said, not all carbs are created equal. Research indicates it’s best to limit high-glycemic index (HGI) carbs–think candy, cookies, and anything white and doughy. This is because your body burns through those in no time, rapidly leaving you lethargic and hungry. On the other hand, low-glycemic index (LGI) carbs–think most fruits and veggies, yogurt, beans and quinoa–are often fiber-filled and take much longer to break down, warding off hunger and keeping your energy levels up for a longer period of time. Post workout, your body needs to replenish its glycogen levels, so either go for LGI carbs or combine healthier HGI carbs with lean protein (e.g. a mango banana smoothie with protein powder). For athletes those options truly are six-of-one/half-dozen-of-another, as you don’t really have to worry about HGI carbs. For the rest of us, when it comes to recovery, I’d recommend sticking with LGI carbs whenever possible. Tip: for post-yoga refueling I make sure to pack an apple or banana (which, p.s., is a borderline HGI fruit) to tide me over until I can get a good, balanced meal in.

For more info on the differences between HGI and LGI fruits or veggies, click here.

In my opinion, the most important thing to keep in mind is that while these are sound nutrition principles worth understanding, life has to be about moderation. I love bread. I eat toast almost every morning, bake my own loaves on the weekends (recipe to come!) and even do the inexplicable Italian thing of eating bread with my pasta. If you truly dislike carbs or have a gluten allergy then, absolutely, steer clear. Otherwise, if you’re more like me, don’t go cold turkey because your diet will be unsustainable. Fuel your body’s daily needs with good carbs and savor those tastier treats periodically. Life is to be enjoyed.